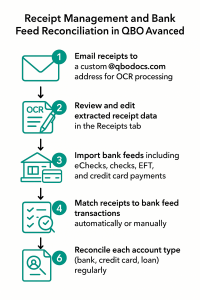
Streamlining Receipt Management and Bank Feed Reconciliation in QBOA Advanced
Managing receipts and reconciling bank feeds are critical tasks for accurate bookkeeping in QuickBooks Online Accountant (QBOA) Advanced. With the power of email-based OCR receipt processing and seamless bank feed matching, you can automate much of the data entry and ensure every payment—whether it’s an eCheck, physical check, EFT, or credit card—is properly accounted for. In this post, we’ll walk through a modern workflow for receipt capture, transaction matching, and account reconciliation, highlighting best practices for every payment type.
Step 1: Email Receipts for OCR Processing
QBOA Advanced allows you to create a custom email address (ending in @qbodocs.com) for forwarding receipts. When you or your team email a receipt (PDF, JPG, PNG, or even a forwarded email), QuickBooks uses optical character recognition (OCR) to extract key details like vendor, amount, and date.
- Set Up Your Receipt Email:
- Go to Transactions → Receipts.
- Select Forward from email and create your unique address.
- Grant access to staff as needed for collaborative receipt capture.
- Email Receipts:
- Send receipts to your QBOA email address immediately after purchase.
- Supported formats: PDF, JPG, PNG, or email attachments.
- Review OCR Results:
- Go to the Receipts tab to review extracted data.
- Edit any fields as needed, assign the correct expense category, and save the transaction.
Tip: Clear, high-contrast images improve OCR accuracy and reduce manual corrections.
Step 2: Bank Feed Import—All Payment Types
Bank feeds in QBOA Advanced can include a variety of payment types:
- eChecks
- Physical checks
- Electronic Funds Transfers (EFT)
- Credit card payments
Each transaction is imported into the Banking tab, ready for review and categorization. These feeds can be linked to checking accounts, credit card accounts, or even loan accounts, depending on the payment type.
Step 3: Match Receipts to Bank Feed Transactions
Once receipts are processed and transactions appear in your bank feed, QBOA Advanced can automatically suggest matches based on amount, date, and vendor. Here’s how to ensure every expense is properly linked:
- Go to Banking → For Review
- Look for Match Suggestions:
- Matched transactions show a Receipt icon in the Category or Match column.
- Click Match to link the receipt and the bank feed transaction.
- Manual Matching:
- If no match is suggested, click Find Match on the transaction.
- Search for the receipt by vendor, amount, or date, then select and match.
- Partial or Split Payments:
- If one payment covers multiple receipts, split the bank feed entry and match each portion to the correct receipt.
Best Practice: Always match (not add) when a receipt exists, to avoid duplicate expenses.
Step 4: Reconcile Every Account—No Matter the Payment Type
No matter how payments are made—eCheck, check, EFT, or credit card—each account in QBOA Advanced should be regularly reconciled. Reconciliation ensures your QuickBooks balances match your bank, credit card, or lender statements, preventing errors and discrepancies.
- Select the Account:
- Go to Accounting → Reconcile.
- Choose the account (bank, credit card, or loan) you want to reconcile.
- Enter Statement Details:
- Input the statement’s ending balance and date.
- Match and Clear Transactions:
- Tick off each transaction that appears on your statement.
- Investigate Discrepancies:
- If the difference isn’t zero, look for duplicates, missing entries, or unmatched receipts.
- Finish and Save:
- Once reconciled, save your reconciliation report for audit and compliance purposes.
Remember: Each account—bank, credit card, or loan—must be reconciled separately for complete accuracy.
Step 5: Prevent and Eliminate Duplicate Transactions
Duplicate transactions can occur if both a receipt and a bank feed entry are added separately rather than matched. Here’s how to find and fix them:
- Use the Audit Log:
- Go to Reports → Audit Log and filter by date or vendor to spot identical entries.
- Check the Banking Tab:
- Sort transactions by amount or payee to find duplicates.
- Delete or Exclude Duplicates:
- Keep the transaction with the most accurate details (usually the matched bank feed + receipt).
- Delete or exclude the duplicate to keep your books clean.
Tip: Set up bank rules and enable duplicate transaction alerts in QBOA to minimize future errors.
Summary Table: Receipt and Bank Feed Management Workflow
| Step | Action | Key Benefit |
|---|---|---|
| Email Receipts | Send to custom @qbodocs.com address for OCR | Automated data extraction, audit-ready records |
| Bank Feed Import | Review all payment types (eCheck, check, EFT, credit card) | Centralized transaction management |
| Match Transactions | Link receipts to bank feed entries | Prevents duplicates, ensures accuracy |
| Reconcile Accounts | Reconcile each account type monthly | Detects errors, maintains clean books |
| Eliminate Duplicates | Audit log, banking tab review, delete/exclude | Clean, reliable financial reporting |
Final Thoughts
With QBOA Advanced, you can automate receipt capture, streamline expense matching, and maintain accurate, reconciled accounts for every payment type. By following these steps and best practices, you’ll reduce manual errors, save time, and ensure your books are always audit-ready—no matter how your payments are made.