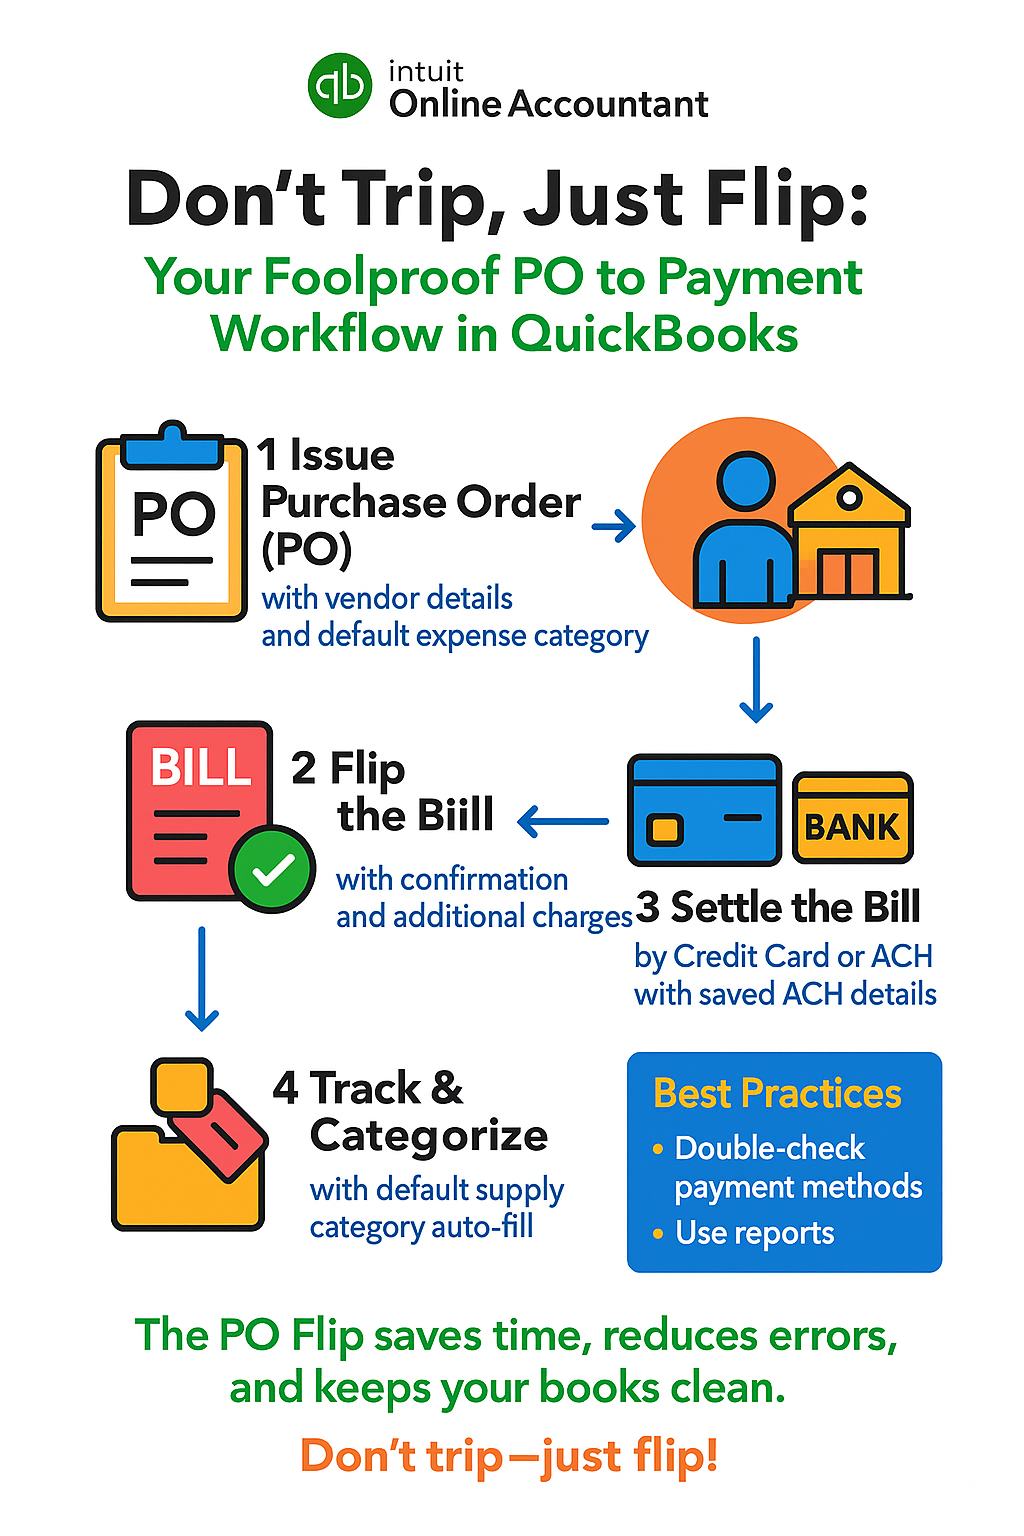
Your Foolproof PO to Payment Workflow in QuickBooks
QuickBooks Online offers purchase order (PO) functionality in its Plus and Advanced subscription plans. If your company uses either of these versions, you can create, manage, and flip POs to bills seamlessly within QuickBooks Online Accountant (QBOA). This guide walks you through the entire PO flip process—from issuing a PO for supplies to Bessie Williams of Books by Bessie, flipping it to a bill, and settling the payment by credit card or ACH—while highlighting key default settings to streamline your workflow.
1. Issuing the Purchase Order (PO)
Purchase orders formalize your intent to buy and provide a clear record for both buyer and vendor. In QuickBooks Online, POs are available in the Plus and Advanced plans.
Steps to create a PO in QBOA:
- Go to + New and select Purchase order.
- In the Vendor dropdown, select “Bessie Williams” (Books by Bessie). If she’s not in your list, quickly add her as a new vendor.
- Review or enter the Mailing address for Books by Bessie.
- Set the Purchase Order date.
- In the Item details section, add the supplies you’re purchasing. Only products/services marked as “I purchase this product/service from a vendor” appear here.
- Optionally, add custom fields or a vendor message.
- Click Save and send to email the PO to Bessie, or Save and close to send it later.
Tip: If you frequently buy the same type of supply from Books by Bessie, set a default expense account (such as “Office Supplies”) in her vendor profile. This ensures consistency and saves time on future transactions.
2. Flipping the PO to a Bill
Once Bessie confirms the order and ships your supplies, you’ll want to “flip” the PO into a bill. This process copies all PO details into a bill, ensuring accuracy and audit trail.
How to convert or Flip a PO to a bill:
- Navigate to Expenses > Vendors.
- Find “Books by Bessie” and locate the relevant PO.
- Click Copy to Bill. All line items, quantities, and prices are transferred automatically.
- Add any additional charges (like shipping) if needed.
- Click Save and Close.
Result: The PO status changes to “Closed,” and the bill is now ready for payment.
3. Settling the Bill: Credit Card or ACH
A. Paying by Credit Card
- Go to the Bill Payments screen.
- Set the payment date.
- In the Method field, select Credit Card.
- Choose the appropriate credit card account.
- Select the bill(s) to pay and click Pay Selected Bills.
QuickBooks will remember your last payment method. If you pay by credit card, it will default to this method next time, so always double-check before confirming payment to avoid misallocations.
B. Paying by ACH (Bank Transfer)
- If using QuickBooks Bill Pay, open the bill and select Schedule Payment.
- Choose your bank account as the funding source.
- Enter or select Bessie’s ACH details (these can be saved in her vendor profile for future use).
- Confirm and schedule the payment.
ACH Payment Capture in Vendor Record:
Once you’ve entered Bessie’s ACH information, it’s saved in her vendor record. This means you won’t need to re-enter it for future payments—QBOA will automatically use the saved ACH details when you choose ACH as the payment method.
If you’re paying outside of QuickBooks (e.g., directly from your bank), you can still record the payment in QBOA. Enter the payment as usual, and in the Ref no. field, note that it was an ACH payment. However, QuickBooks currently cannot automatically email Bessie a remittance advice if the payment is processed outside its system, so be sure to add this step to your workflow. This will ensure that the Vendor has the information to apply your payment correctly.

4. Default Supply Category in Vendor Record
To streamline expense tracking, assign a default expense account to Books by Bessie:
- Go to Expenses > Vendors.
- Find and edit Bessie’s vendor profile.
- Under Default expense account, select your preferred supply category (e.g., “Office Supplies” or “Books & Reference Materials”).
- Save changes.
Now, every time you create a bill, expense, or check for Bessie, QBOA will auto-populate this category in the transaction—reducing errors and ensuring accurate reporting.
5. Best Practices and Tips
- Audit Trail: The PO flip process ensures a seamless, traceable flow from order to payment, minimizing manual entry and errors.
- Payment Method Defaults: Always check the payment method before confirming bill payments, as QBOA defaults to your last used method.
- ACH Vendor Setup: Once Bessie’s ACH info is saved, payments are quick and secure. If she’s hesitant to provide ACH info, consider using a third-party integration like Melio as a backup.
- Reporting: Use reports like “Open Purchase Order List” and “Purchases by Vendor Detail” to monitor outstanding orders and vendor activity.
In summary:
The PO flip in QBOA—issuing a PO, converting it to a bill, and settling the bill via credit card or ACH—offers a robust, efficient workflow. By leveraging vendor defaults for payment and expense categories, you ensure accuracy, save time, and maintain clean financial records.