Getting Started with QuickBooks Online Bank Reconciliations After Upgrading
If you’ve recently upgraded from an entry-level QuickBooks Online subscription to a more advanced plan, you now have access to powerful tools for managing your business finances. One of the most essential features you’ll want to master is bank reconciliation. This guide will walk you through the process of getting started with bank reconciliations in QuickBooks Online, focusing on the practical steps and best practices for a smooth experience.
What Is Bank Reconciliation in QuickBooks Online?
Bank reconciliation is the process of comparing the transactions recorded in your QuickBooks account with those on your bank statement, ensuring that your books accurately reflect your real-world financial activity. With your upgraded subscription, you can leverage enhanced automation, reporting, and documentation features to streamline this process and maintain reliable records.
Before You Begin: Preparation Steps
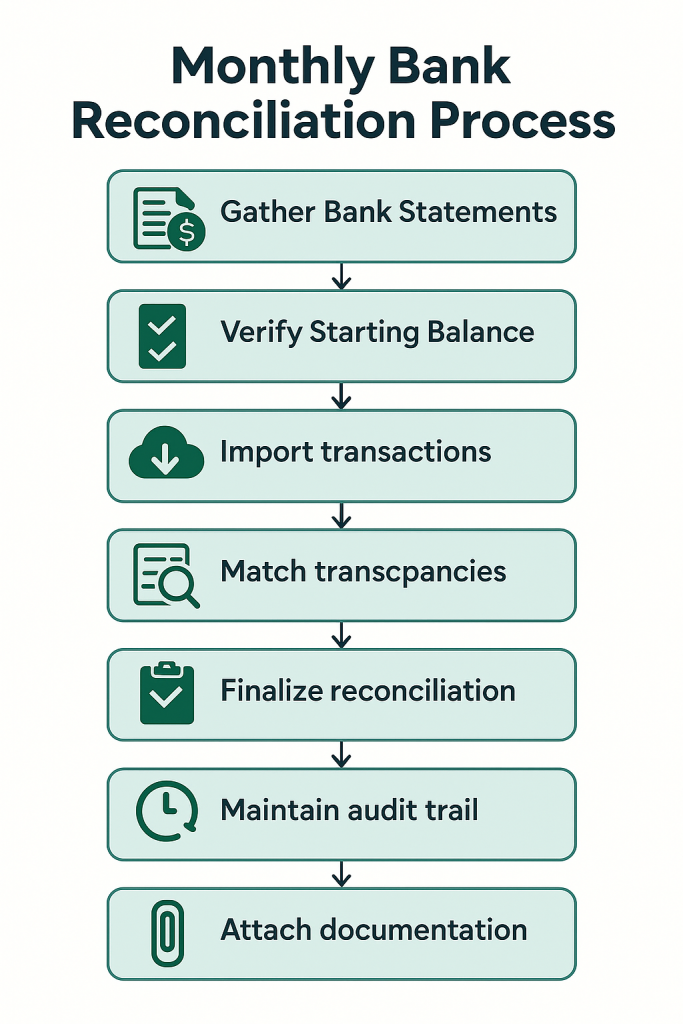
- Gather Your Bank Statements: Download or collect your most recent bank statements. If you’re reconciling for the first time, start with the earliest unreconciled month and work forward.
- Verify Your Starting Balance: Ensure the beginning balance in QuickBooks matches the ending balance from your last reconciled statement (or your account’s opening balance if you’re starting fresh).
- Review Imported Transactions: If you’ve connected your bank feed, review all imported transactions and confirm they’re complete and accurate before starting reconciliation.
Step-by-Step: How to Start Your First Bank Reconciliation
Access the Reconciliation Tool
In QuickBooks Online, click the Gear icon, then select Reconcile under the “Tools” section. This opens the reconciliation dashboard, where you’ll manage all future reconciliations.
Select the Account to Reconcile
Choose the bank or credit card account you want to reconcile from the dropdown menu. Double-check that you’ve selected the correct account, especially if you manage multiple accounts.
Enter Statement Information
Input the Ending Balance and Ending Date exactly as they appear on your bank statement. QuickBooks will automatically fill in the beginning balance based on your last reconciliation or opening balance.
Match Transactions
Compare each transaction in QuickBooks with your bank statement. Check off each one as you confirm it matches. Use filters to quickly locate specific transactions if needed. If you find a transaction on your statement that’s missing in QuickBooks, add it before continuing.
Resolve Discrepancies
If the difference between your QuickBooks records and your bank statement isn’t zero, investigate unmatched or duplicate transactions. Use QuickBooks’ built-in discrepancy tools and reports to help identify and resolve issues.
Finalize and Save
Once the difference is zero and all transactions are matched, click Finish Now or Reconcile to complete the process. QuickBooks will generate a reconciliation report for your records.
Best Practices for Smooth Reconciliations
Reconcile Regularly: Set a schedule (monthly, at minimum) to keep your records accurate and catch errors early.
Leverage Automation: Use bank feeds and transaction rules to automatically import and categorize recurring transactions, reducing manual work and minimizing errors.
Review Discrepancy Reports: After each reconciliation, review any flagged discrepancies or unusual activity. QuickBooks provides reports to help you quickly spot issues that need attention.
Document Adjustments: If you need to make adjusting entries (such as for bank fees or interest), add clear memos and attach supporting documents for transparency.
Managing Unmatched and Duplicate Transactions
During reconciliation, you may encounter transactions that don’t match your bank statement or appear more than once. Here’s how to handle them:
Unmatched Transactions: Investigate missing or unmatched transactions by cross-referencing your bank statement and QuickBooks register. Add or edit entries as needed to ensure accuracy.
Duplicate Transactions: Exclude duplicates from the bank feed before adding them to your register. If a duplicate is already in the register and not reconciled, delete it. If it’s already reconciled, consult your accountant before making changes to preserve your audit trail.

Using Audit Trails and Supporting Documentation
Your upgraded QuickBooks Online plan includes robust audit trail features. The audit log tracks every change made to your transactions—who made it, when, and what was changed—ensuring transparency and compliance.
Access the Audit Log: Go to the Settings (gear icon) and select Audit Log. Filter by date or user to review monthly activity and print or save the log for your records.
Attach Documentation: Upload and attach receipts, invoices, and other supporting documents directly to each transaction. This makes tax time easier and ensures every entry is backed by proof.
Maintain a Clean Audit Trail: Document any adjustments or corrections you make during reconciliation. Use the memo field or a separate log to note the reason for changes, which helps during audits or financial reviews.
Summary Table: Key Steps and Tools
| Step | Action | QuickBooks Tool |
|---|---|---|
| 1 | Access Reconciliation Tool | Gear Icon > Reconcile |
| 2 | Select Account & Enter Statement Info | Reconcile Dashboard |
| 3 | Match Transactions | Bank Feed, Filters |
| 4 | Resolve Discrepancies | Discrepancy Reports |
| 5 | Finalize & Save | Reconciliation Report |
| 6 | Maintain Audit Trail | Audit Log, Attachments |
Final Tips for Success
- Stay consistent with your reconciliation schedule to avoid falling behind.
- Use the audit log and attach documentation to every transaction for peace of mind during tax season and audits.
- Take advantage of automation and reporting tools in your upgraded plan to save time and reduce errors.
- Consult your accountant or QuickBooks ProAdvisor for complex issues or if you need to undo reconciliations from previous periods.
By following these steps and best practices, you’ll get the most out of QuickBooks Online’s bank reconciliation features, ensuring your financial records are accurate, audit-ready, and fully supported for tax purposes.


