Vendor Onboarding—Where Tax Ready Begins
Key Concept
You can’t issue a 1099 to a vendor you don’t have complete information for. And you can’t get that information in January for work done in March of the prior year.
The Vendor Onboarding Principle: Capture compliance data before the first payment, not after. Prevention costs less than cleanup.
Figures (Full Resolution)
Click any figure to view full-size or download.
Figure 2.1: QBO Lists Menu
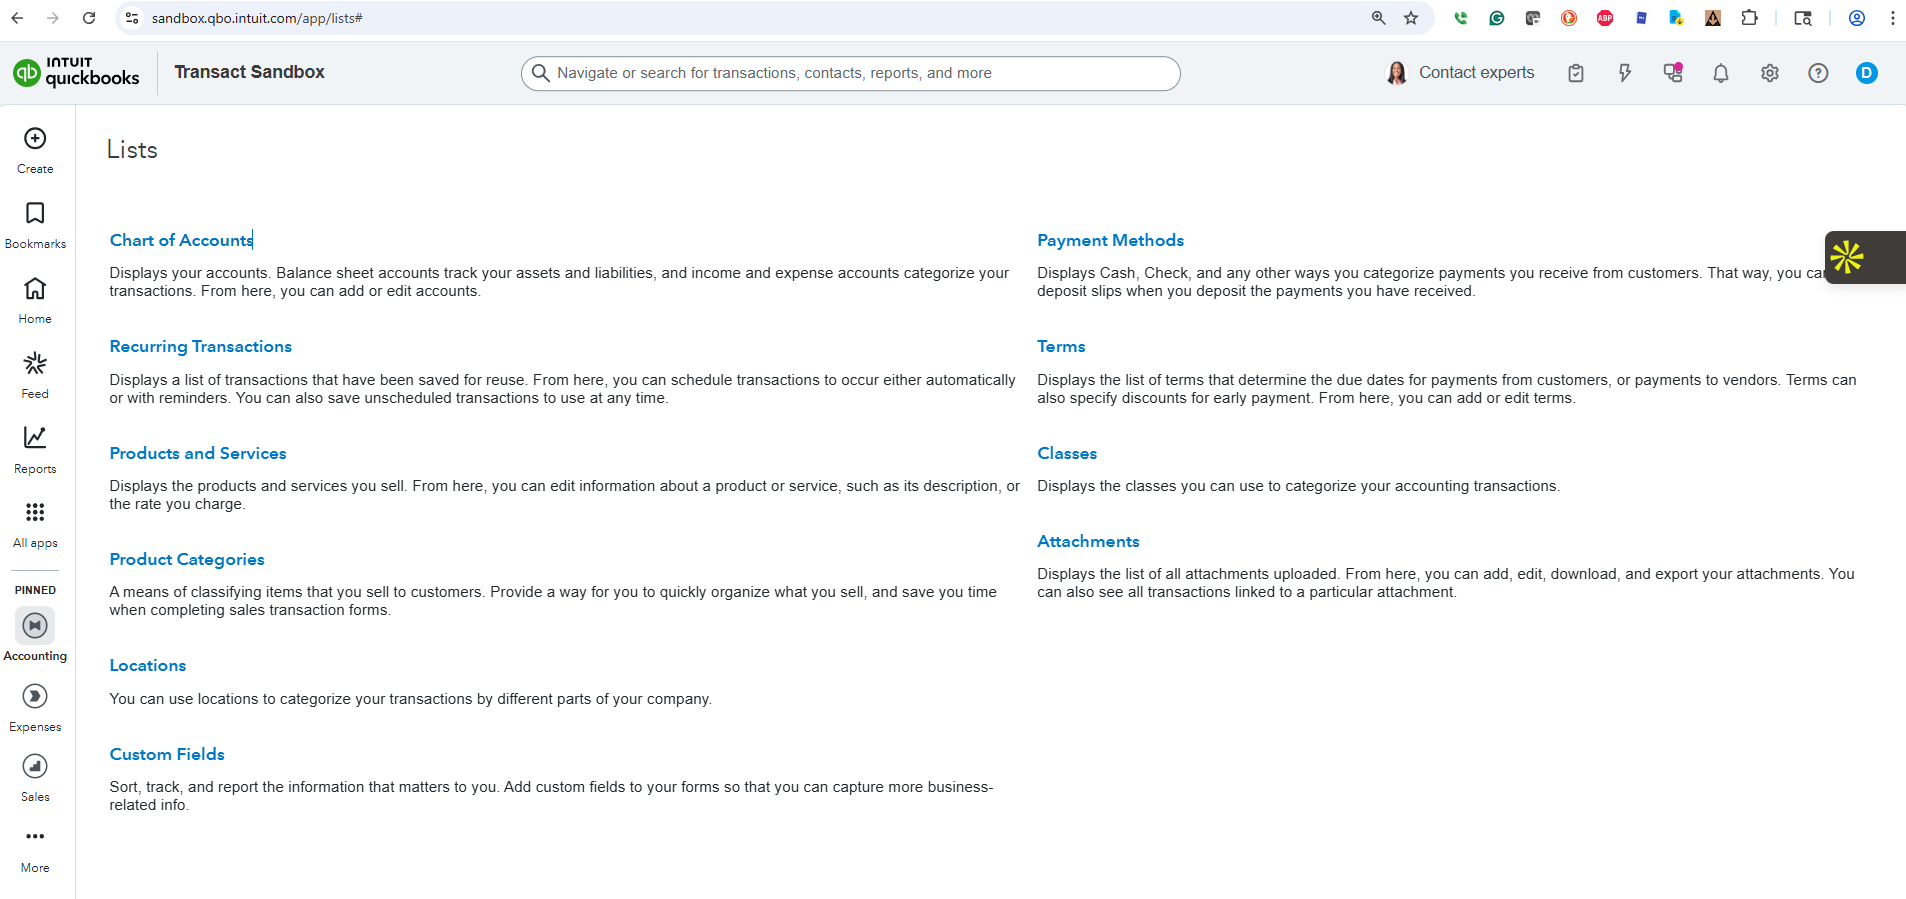 Navigate to Lists to access Vendors, Chart of Accounts, and Custom Fields—the building blocks of Tax Ready structure.
Figure 2.2: Vendor Tax and ACH Setup
 The vendor detail panel showing Tax ID field, “Track payments for 1099” checkbox, and Bill Pay ACH information—all essential for compliance.
Figure 2.3: Custom Vendor List View
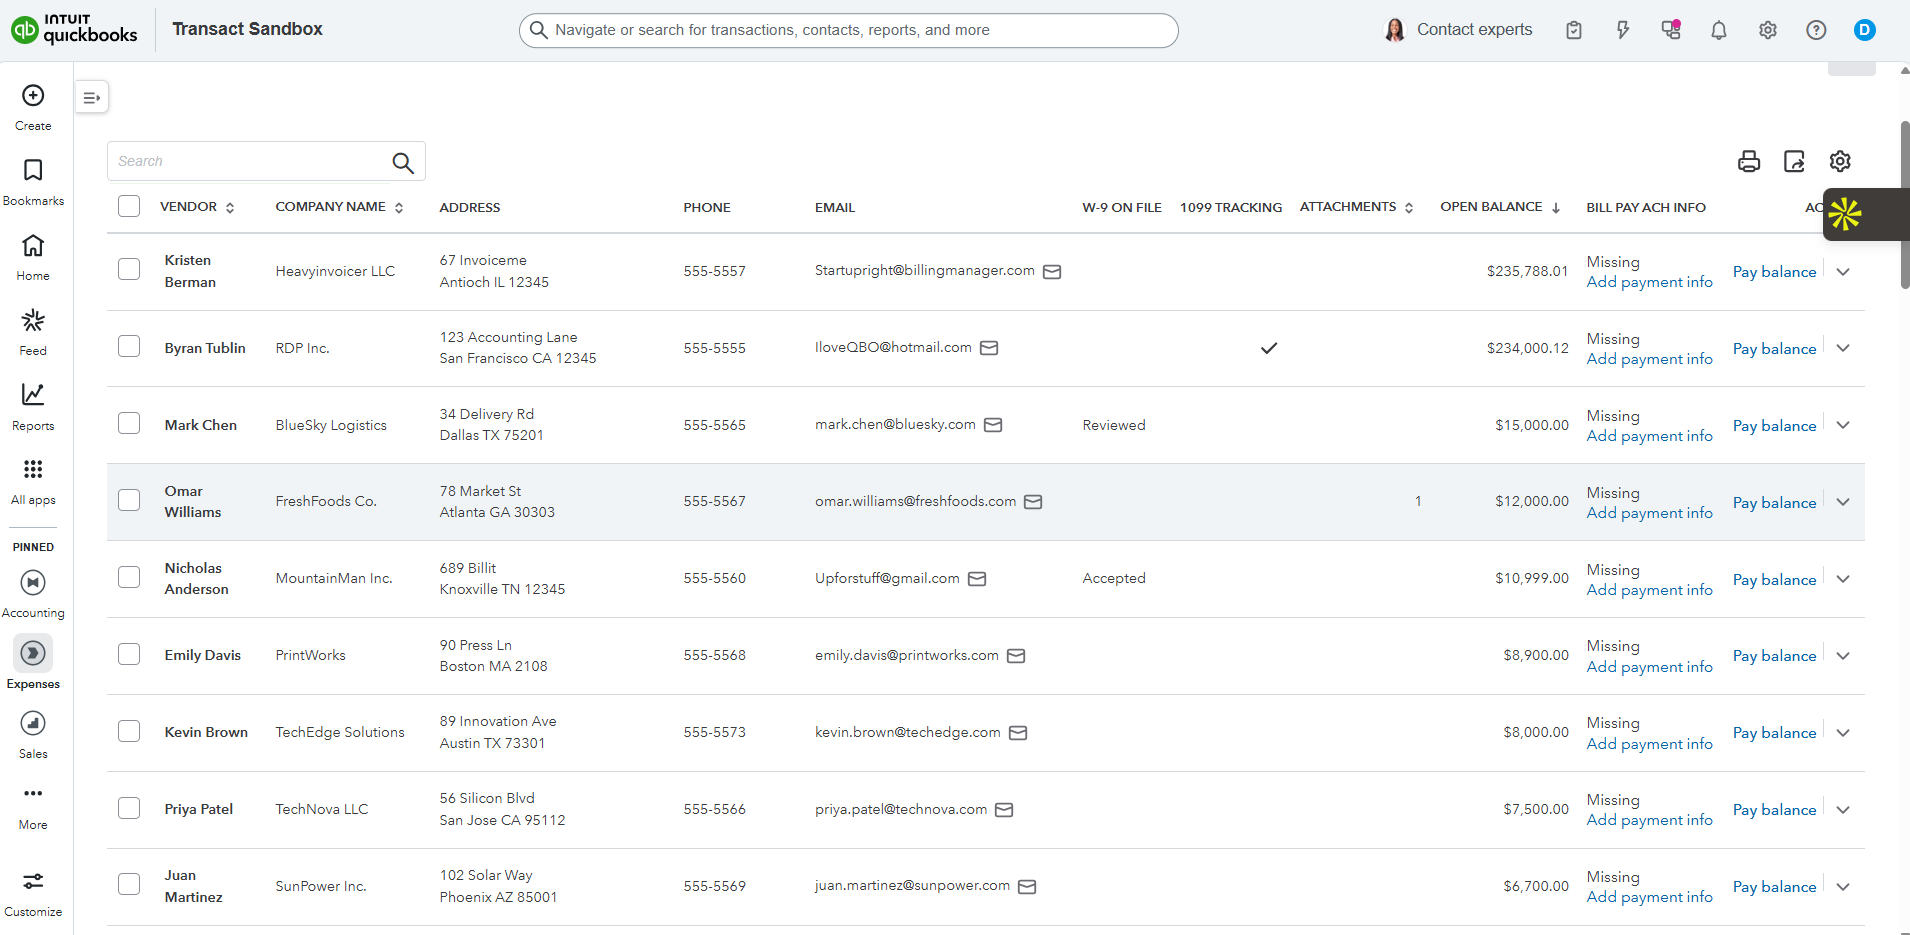 A custom vendor list showing W-9 status, 1099 tracking, attachments, and ACH info at a glance. Notice the “Missing” indicators—gaps you can address proactively.
Figure 2.4: Vendor Onboarding Workflow
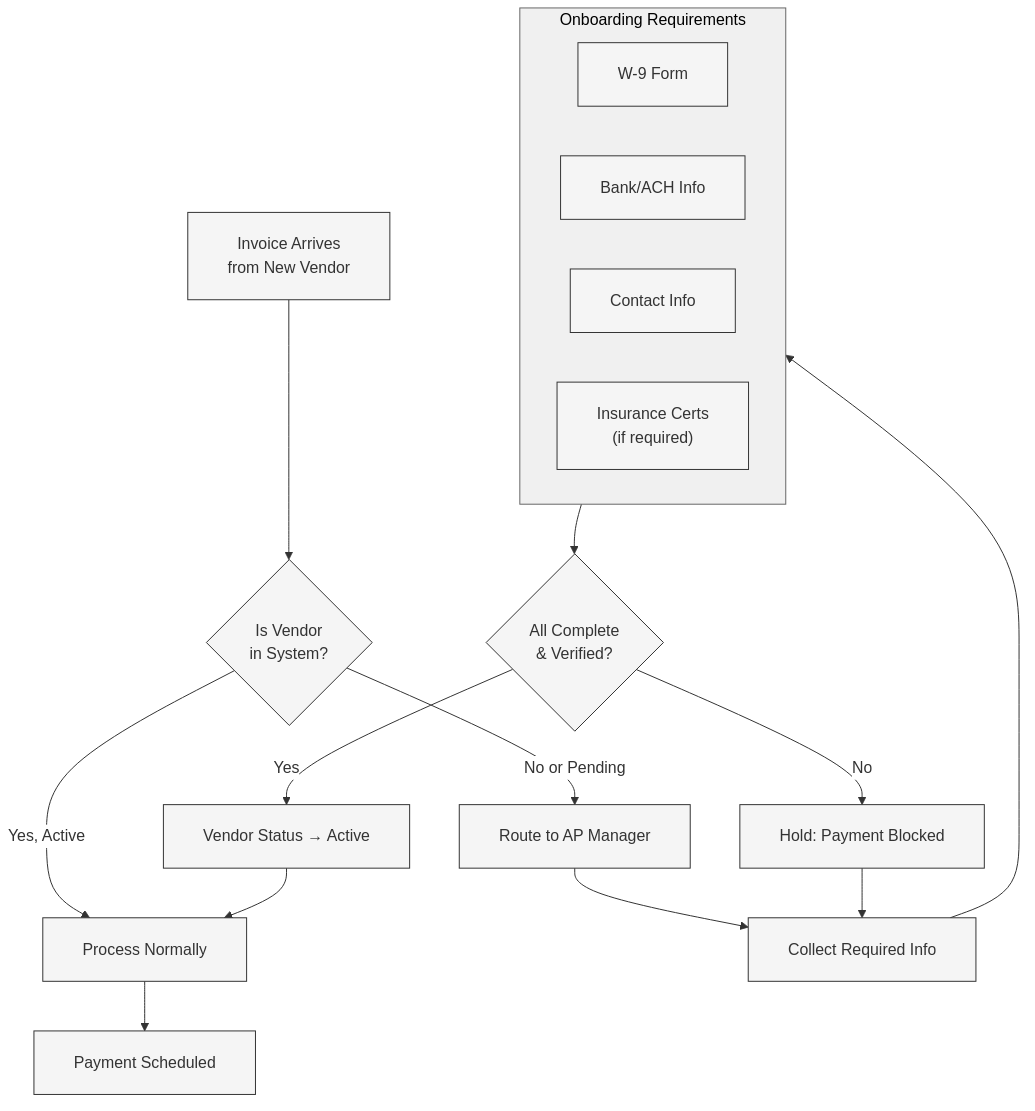 The 5-step vendor onboarding workflow: Request → Receive → Verify → Enter → Confirm. Each step has specific deliverables.
Downloadable Templates
Email Templates
W-9 Request Email Template
Copy and customize for your business:
Subject: W-9 Request - [Your Company Name]

Hi [Vendor Contact],

We're setting you up as a vendor in our system. Before we can process
your first invoice, we need a completed W-9 form for our records.

Please complete and return:
- W-9 form (attached blank copy, or use your own)
- Preferred payment method (check or ACH)
- If ACH: bank name, routing number, account number

You can reply to this email with the completed documents or upload
them securely at: [your upload link]

We'll confirm receipt within 2 business days.

Thank you,
[Your Name]
[Your Company]
Download W-9 Request Template (Word)
Checklists
- Vendor Onboarding Checklist (PDF) – 5-step process with verification checkpoints
- 1099 Compliance Checklist (PDF) – Year-end preparation guide
- Vendor Data Audit Worksheet (Excel) – Identify gaps in your vendor records
Video Walkthrough
Setting Up Custom Vendor Fields in QBO (Coming Soon)
Learn how to add custom fields to track W-9 status, payment method verification, and other compliance data.
The 5-Step Vendor Onboarding Process
| Step | Action | Deliverable | Timeline |
|---|---|---|---|
| 1 | Request | Send W-9 request email | Day 0 |
| 2 | Receive | Collect W-9 and payment info | Day 1-5 |
| 3 | Verify | Validate TIN (optional TIN match) | Day 5-7 |
| 4 | Enter | Create vendor in QBO with all fields | Day 7 |
| 5 | Confirm | Send confirmation to vendor | Day 7 |
Key Rule: No payment until Step 4 is complete.
1099 Quick Reference
| Threshold | Form | Deadline | Penalty (if late/missing) |
|---|---|---|---|
| $600+ for services | 1099-NEC | January 31 | $60-$310 per form |
| $600+ for rent | 1099-MISC | January 31 | $60-$310 per form |
| $10+ in interest | 1099-INT | January 31 | $60-$310 per form |
Pro Tip: The 1099-NEC deadline is firm—January 31, no extensions. Start your vendor audit in December.
Key Takeaways
- Vendor onboarding is a control point – Treat it as financial compliance, not administrative task
- W-9 before first payment – No exceptions, no “we’ll get it later”
- Custom fields track compliance – Use QBO custom fields to monitor W-9 status
- Year-end starts in January – Capture data as vendors are added, not at year-end
Your Next Step
Run a vendor list in QBO filtered by: – 1099 tracking = Yes – Missing Tax ID or address
Any vendors on that list are 1099 compliance risks. Start collecting W-9s now.
Need help cleaning up vendor data? Apply for a complimentary Tax Ready Assessment